Book an Appointment with the AR Provider App
This new flow mirrors the web, so you can now add cancellation policy, service deposits, book outside of scheduled hours and double book.
1. Inside the AR Provider App, click the schedule icon to add a new appointment.

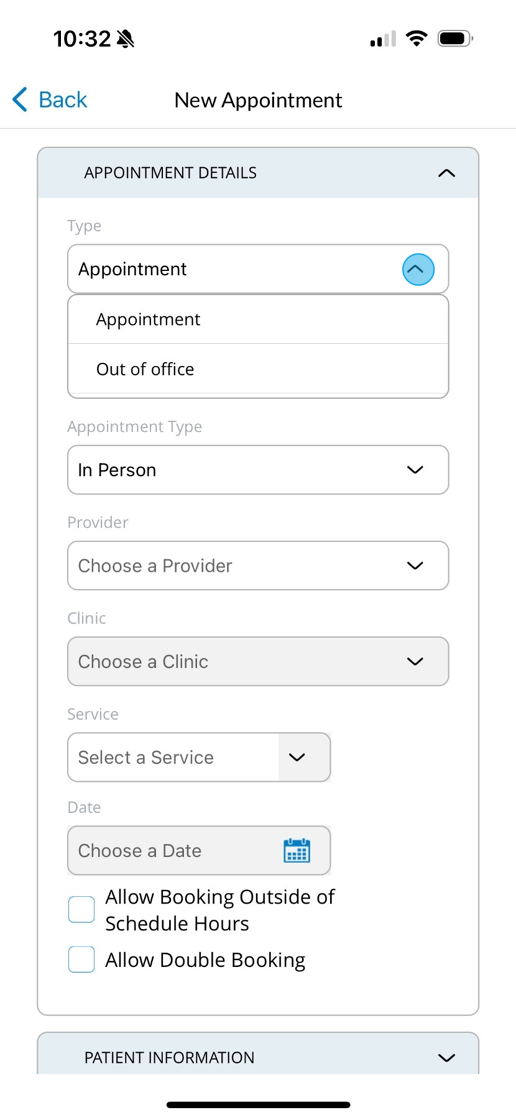
2. Click to add an Appointment or an Out of Office Event.
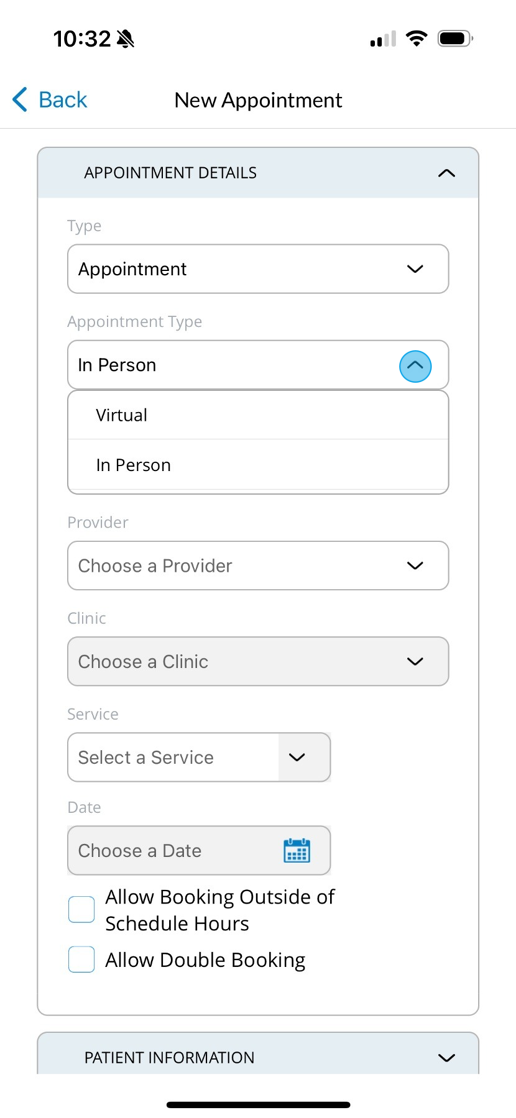
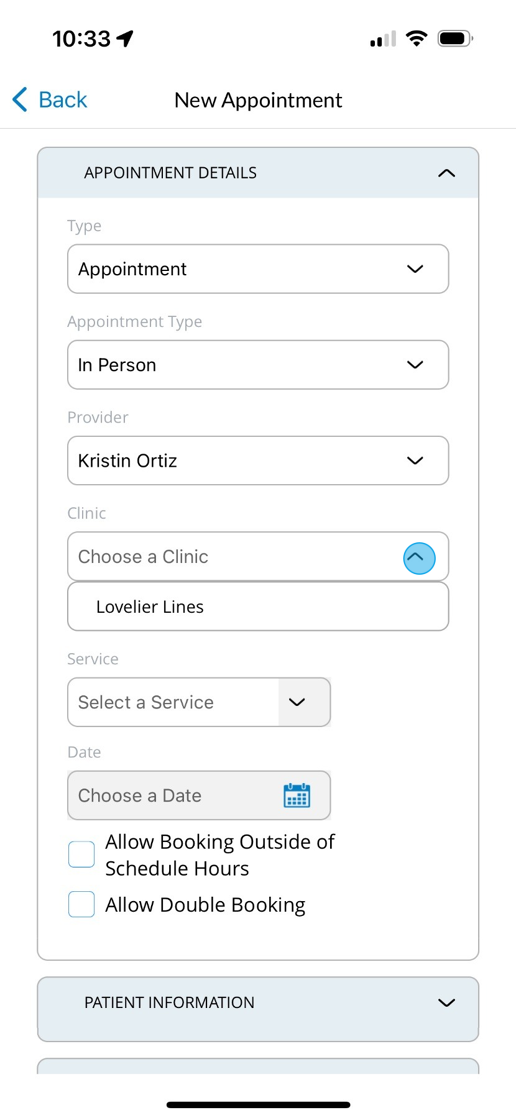
3. If an Appointment, choose In Person or Virtual.
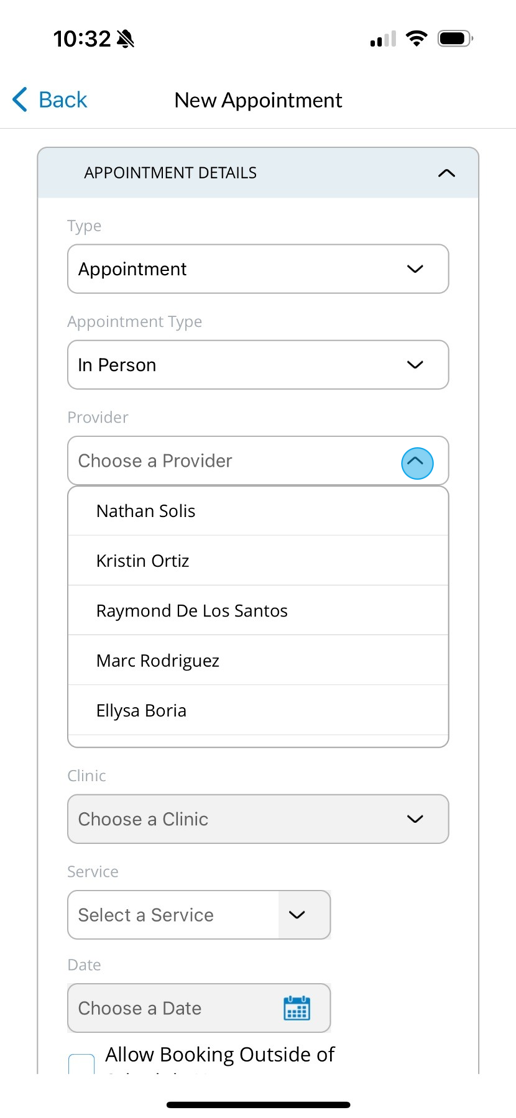
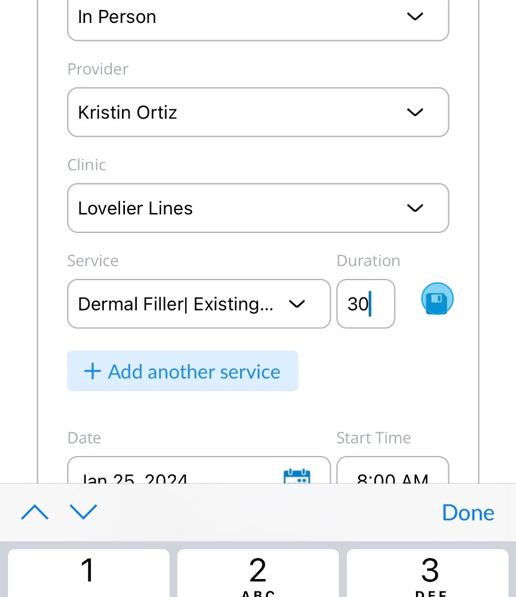
4. Scroll to locate the right provider or begin typing their name.
5. Choose the appropriate clinic. This works just like web-based booking. The same clinics associated to the Provider on the web will show here.
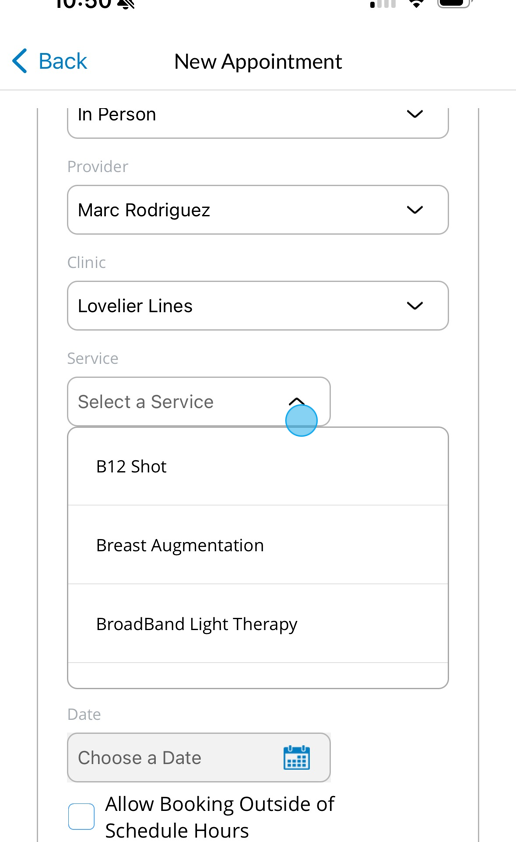
6. Scroll to locate the right service or begin typing the name.
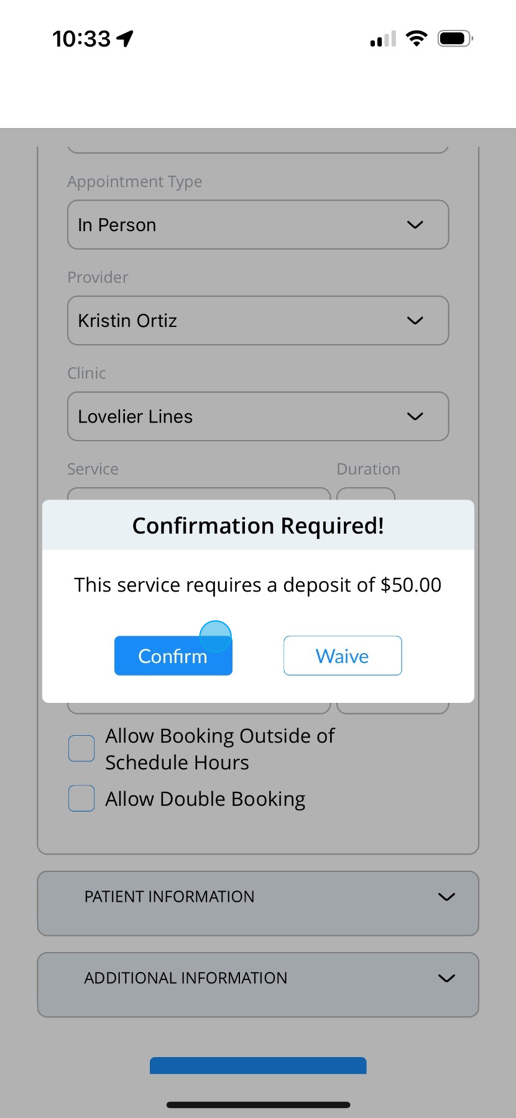
7. If the service you select requires a deposit, you will see the confirmation box. Choose to confirm or waive.
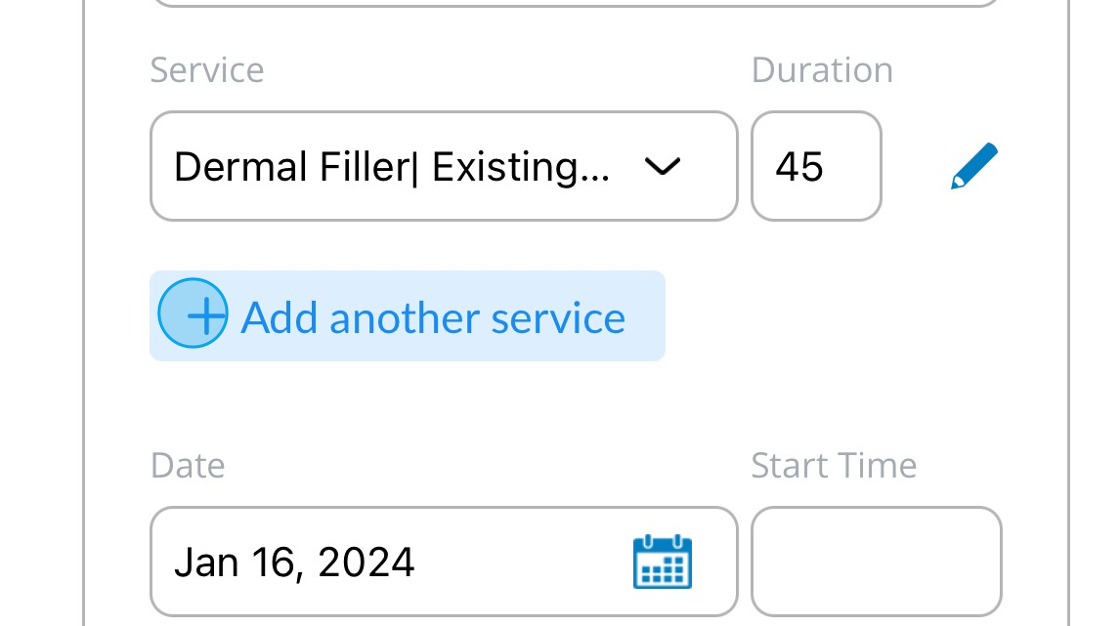
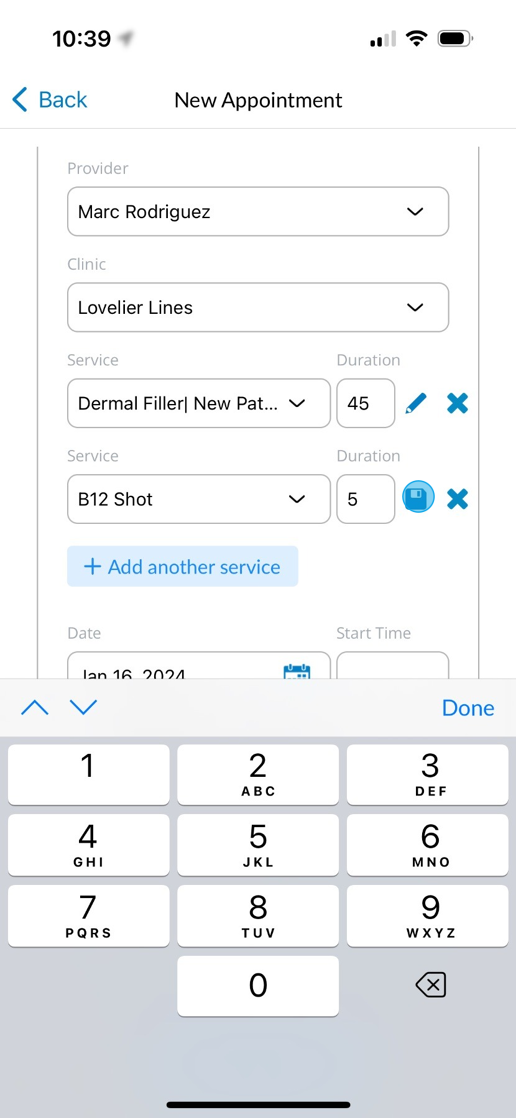
8. You can change the duration of a service by clicking the edit pencil and changing the time.
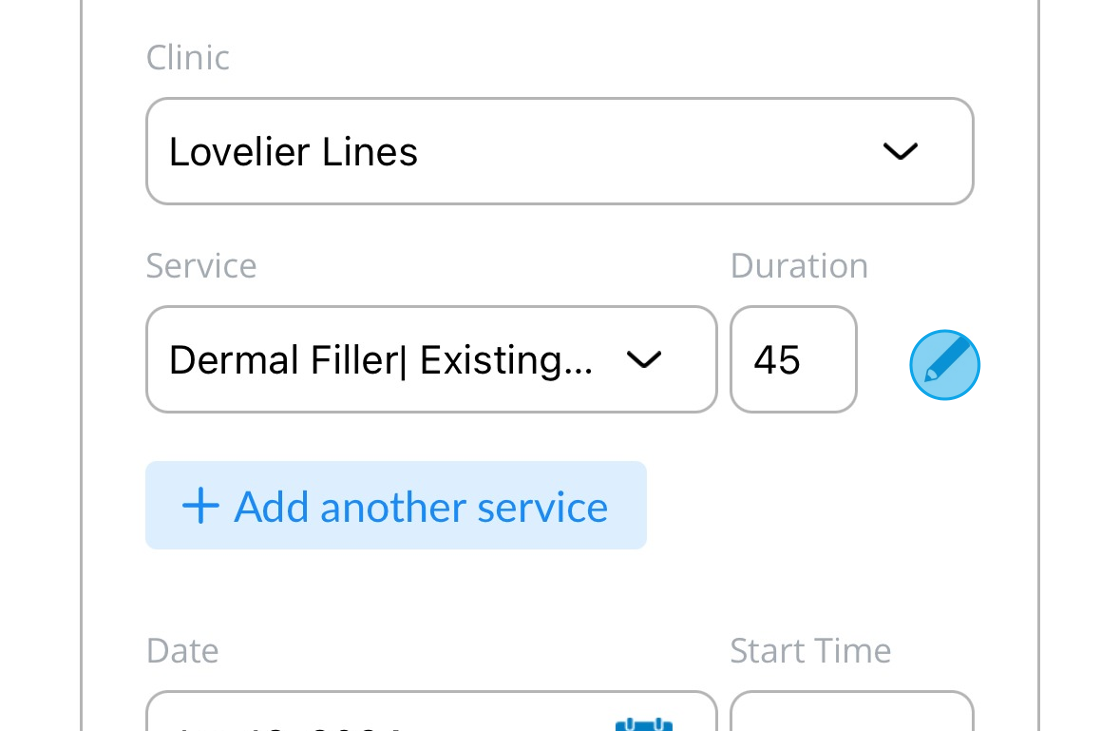
9. Click the save icon to save the change.
10. You can add more services by clicking the Add Another Service button.
11. You can follow the same steps to change the duration of added services. Pencil > Update > Save.
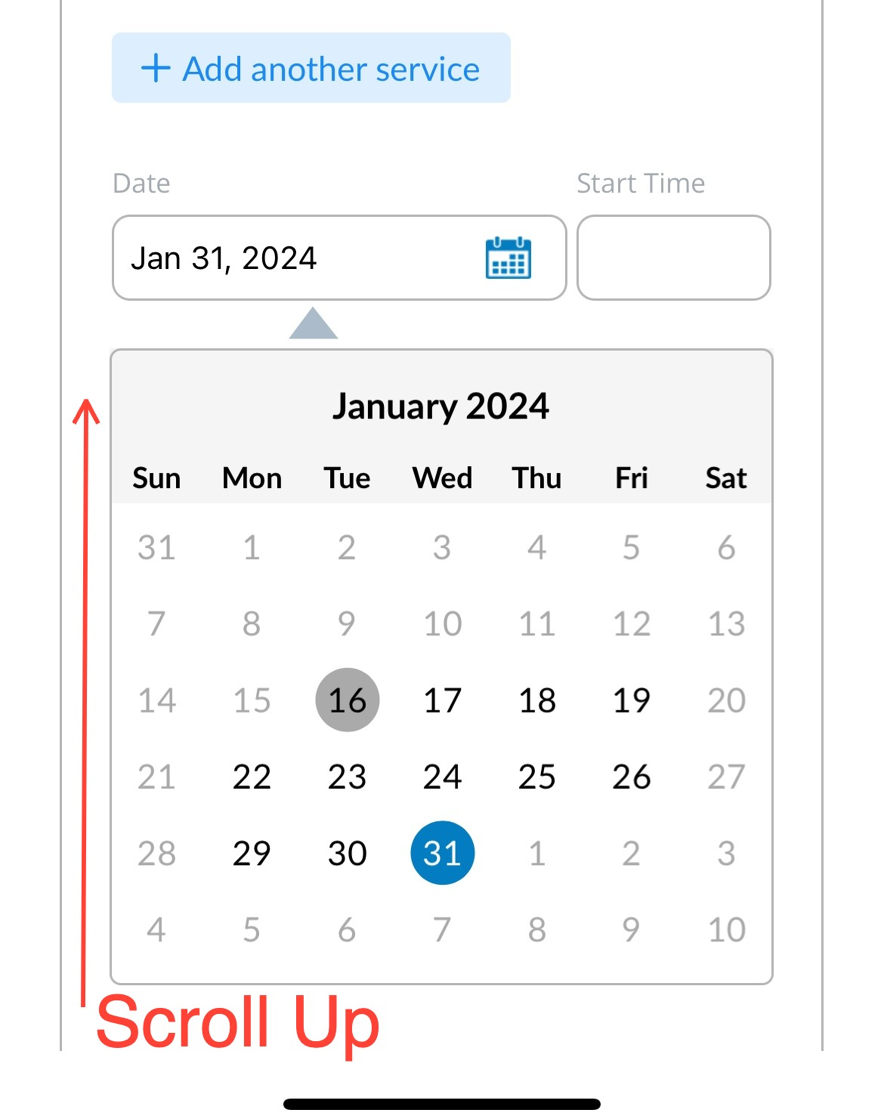
12. When choosing a date and time, it will default to today. Click on the calendar to open up the date picker.
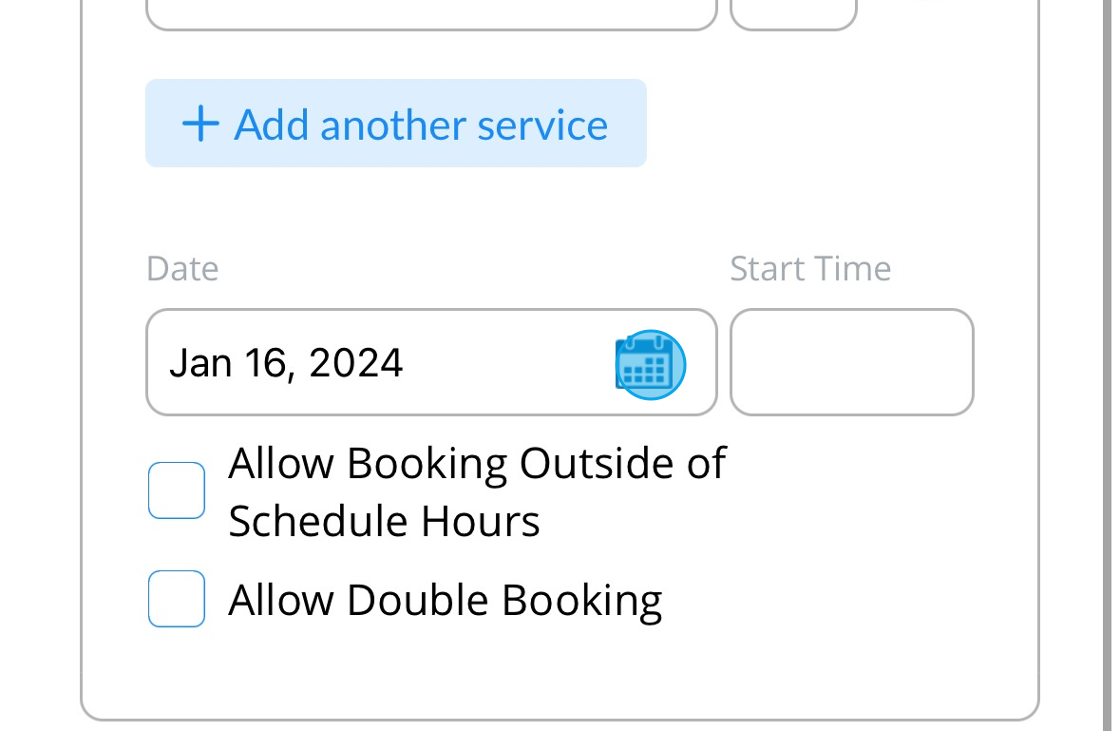
13. To change the month, continue scrolling up on the date picker.
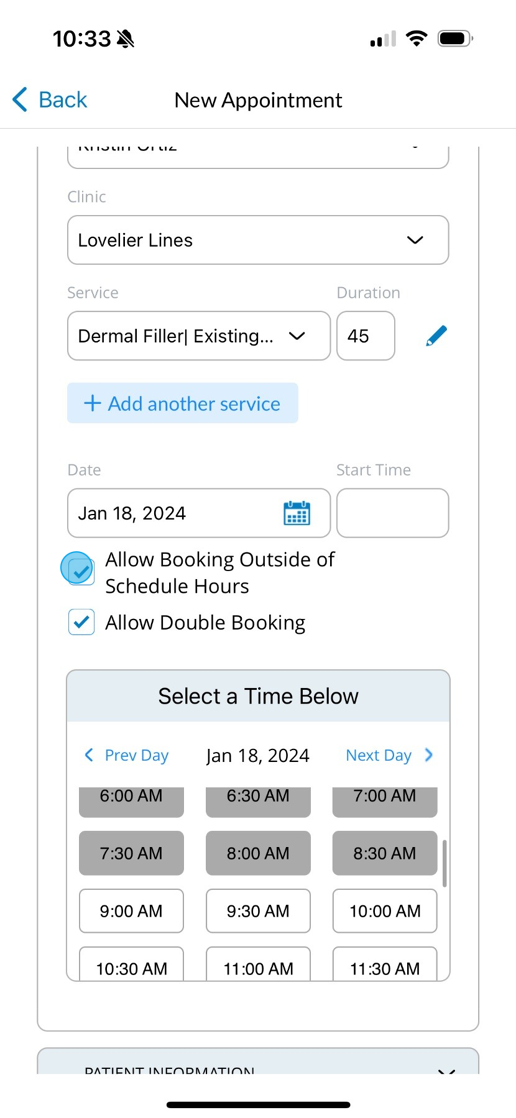
14. When choosing a date & time, you can now book outside of scheduled hours and double book. This flow mirrors the web.
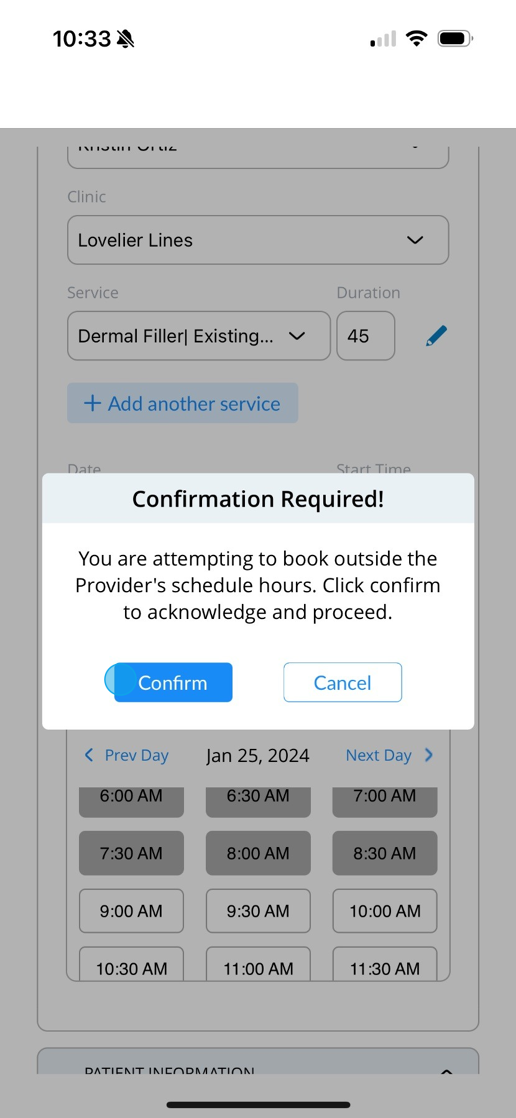
15. If you choose a time outside of scheduled hours, you will need to confirm via the pop up box.
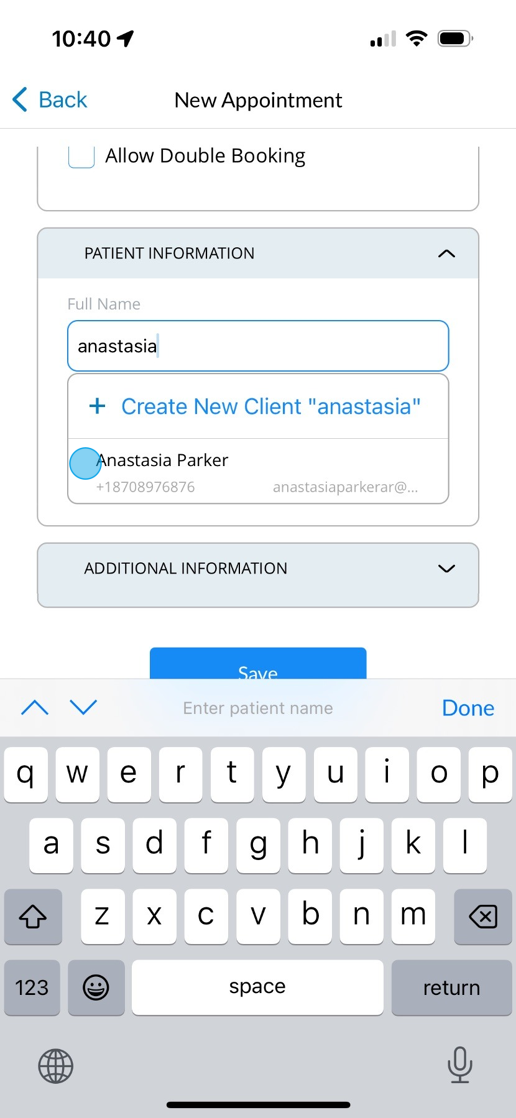
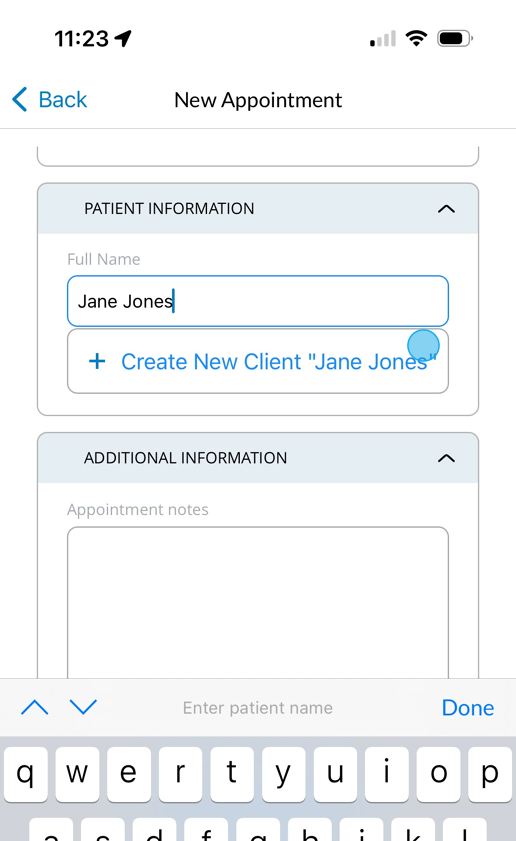
16. When adding Patient information, begin typing their first name. If the Patient is already saved to your list, their name will appear, and you can select their name by holding your finger on their name.
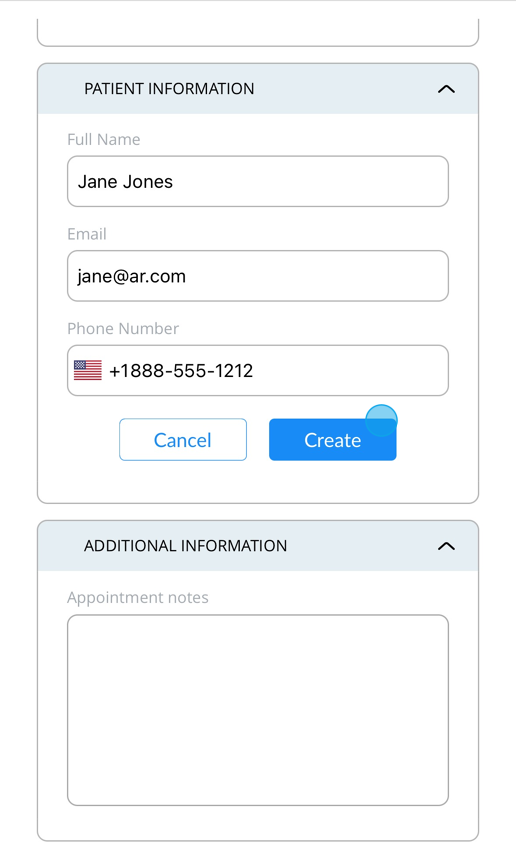
17. To add a new patient, type their first and last name, and then when the create hyperlink appears, tap & HOLD it to open up the editing box.
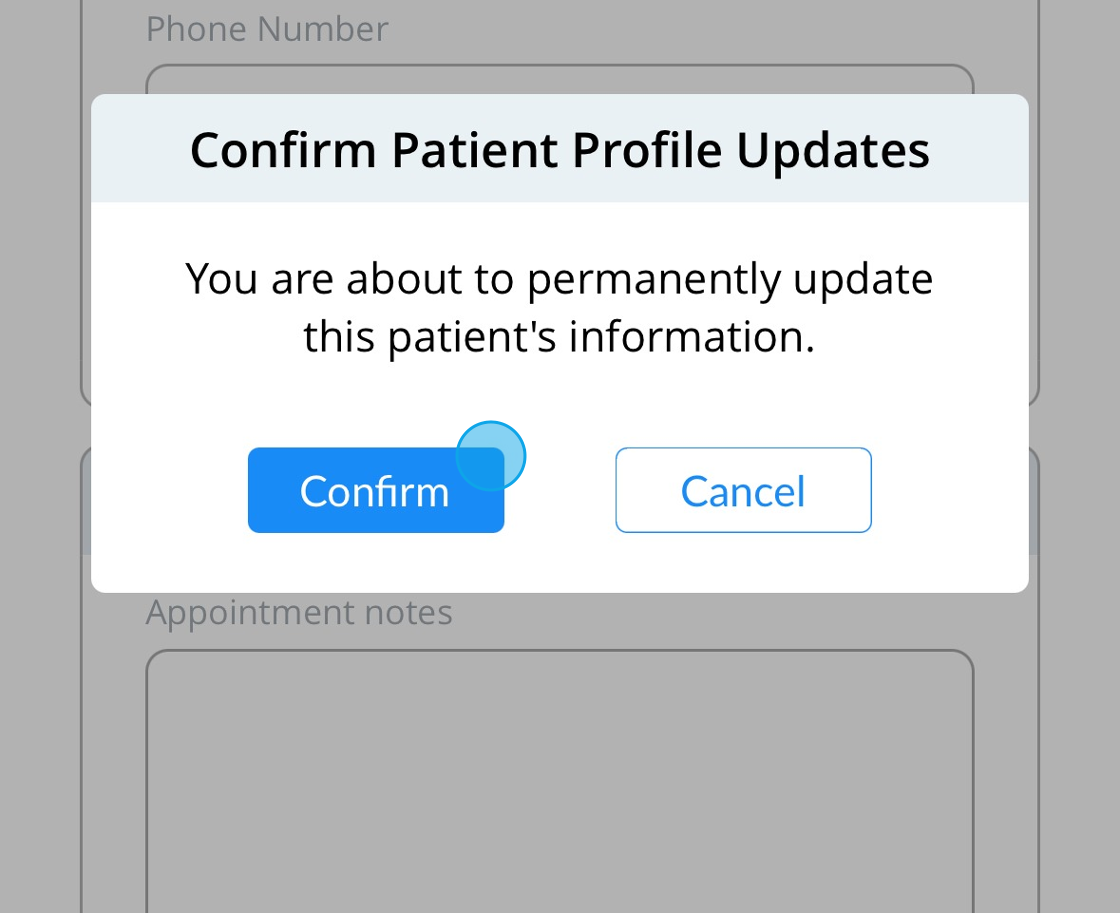
18. Complete the new Patient's information and save by clicking Create.
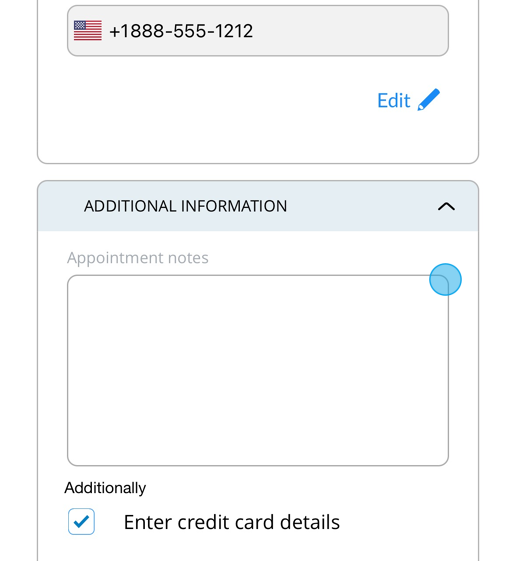
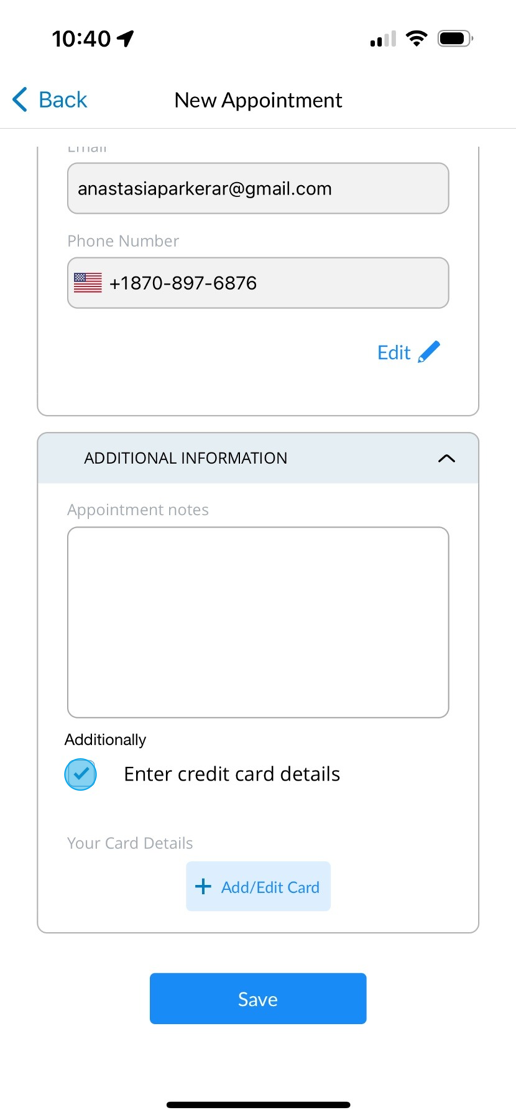
19. You will see a pop up confirming the addition of this Patient to your Patient list. If the information is correct, click Confirm.
20. Add any notes you'd like to be visible on the appointment.
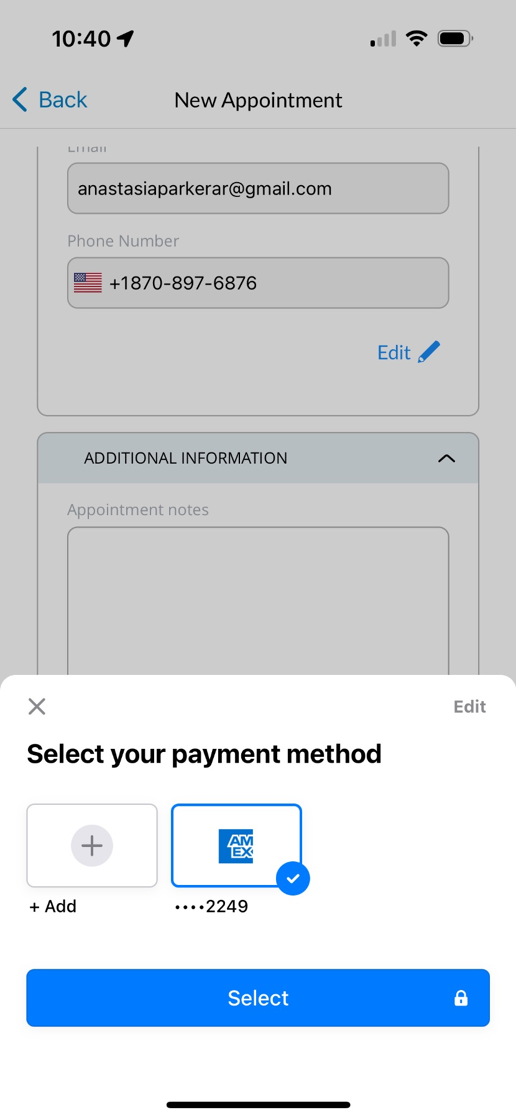
21. If your cancellation policy is turned on, Enter Credit Card Details will be checked by default. If the Patient has a card on file, you can click Save to complete the appointment.
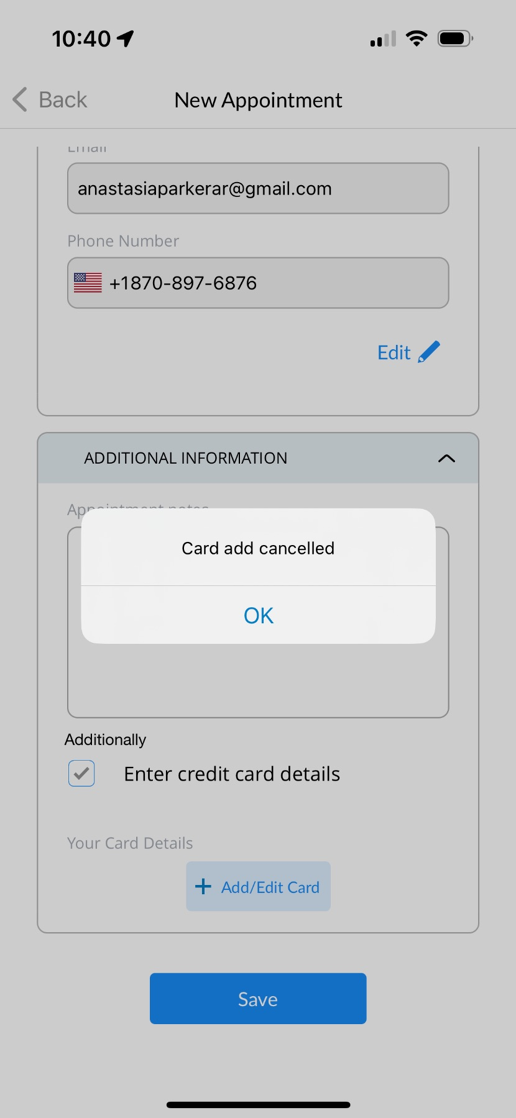
22. This will bring up their saved cards on file, and you can choose to select, add a new card, or click the X.
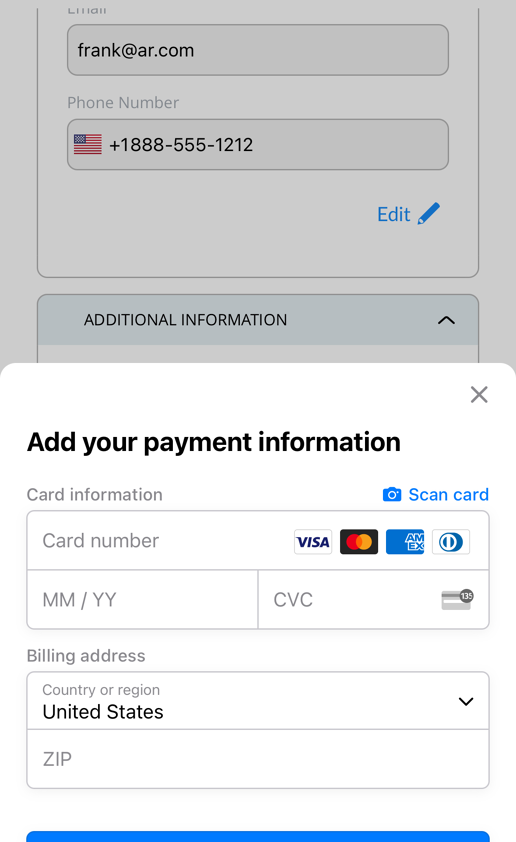
23. If you click the X, you will see a dialogue box that you've cancelled the card add.
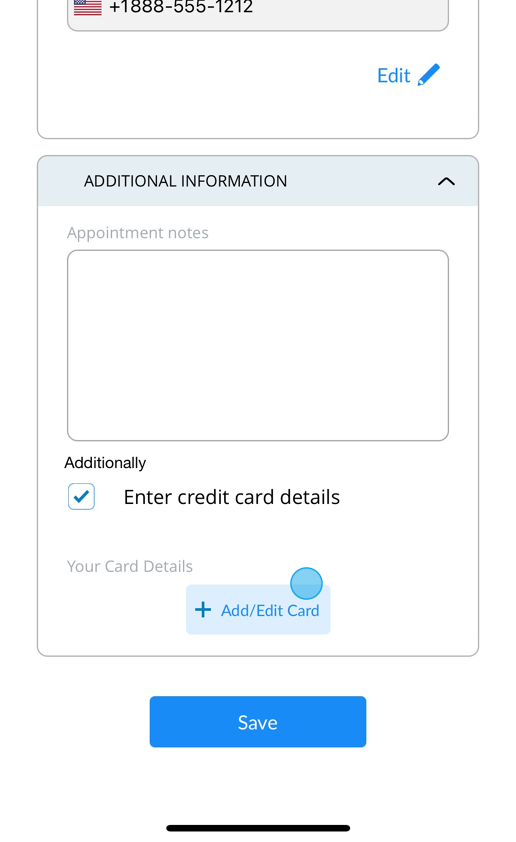
24. To add a new Patient's credit card information, click to Add/Edit Card & input the information.
25. Add the new Patient's credit card information- this view will vary between Clearent and Stripe.
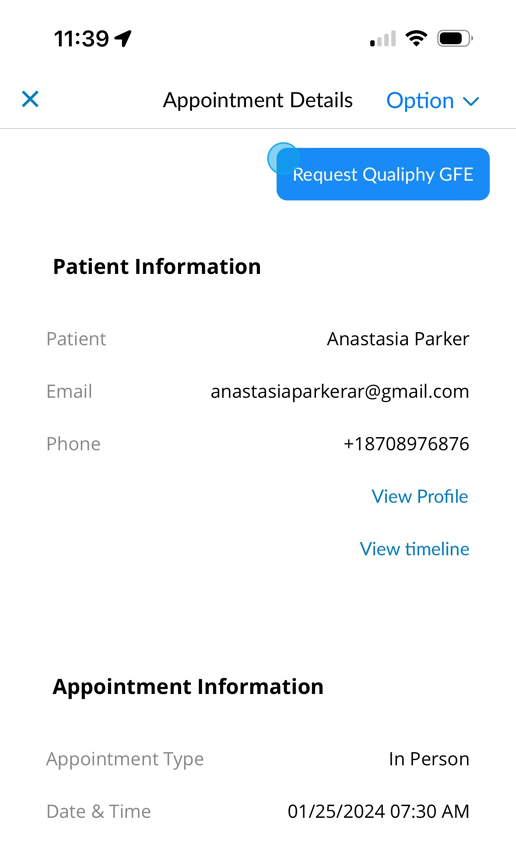
26. If you do not wish to enroll the Patient in the cancellation policy, you will need to unclick the default enrollment, and you will see the pop up asking you to confirm this action.

27. Once you've completed all steps, click Save to save the appointment. Please note, you cannot request a Qualiphy exam from this menu at the moment. You can open the appointment from the Calendar to do so or request one from the Patient's timeline.