Using and Managing Memberships in AR
This article will discuss all the need-to-knows of the membership feature inside of AR! In this article we will show you how to:
- Create a Membership
- Cancel a membership
- Start a membership
- Understanding proration
- Hold and Resume a membership
Your first step to using memberships is to create a program. You will want to make sure that point of sale is activated for your account!
Go to settings, POS, Patient Loyalty to create a new program. Click "add new type" once you've toggled it on.
Next, we will define what each section means on the creation page. Go ahead and name your program!
Discounts- this is a blanket discount. If your member is enrolled, and you've entered 5% for example, they get 5% off everything.
Payment frequency- you can choose monthly, yearly or both. We recommend building one membership for monthly plans and one membership for yearly, just so it is easier to sort through and easily differentiate the plans on your reports and when looking at a patient's profile.
One time setup fee- this fee is paid one time, at the time of signing the patient up
Monthly fee- refers to the recurring monthly amount that a patient will be charged for the program
Adding membership fee into the patients wallet- each month or year that a payment is completed the total amount paid will be auto inserted to the patients wallet
Show membership on the patient portal- just means, do you want to sell this membership online
Show discounts and free goods on the patient portal- during the sign up process, a patient would be able to see what you've entered into the discount box and the free goods box.
Description for booking portal- this is the description shown to a patient
As you look at the membership module within a patient's profile you will see a few different areas.
First, you will notice that each membership has a status. That status has a color as well which you will find the definitions below:
Green- means that there is an active membership
Red- means that the membership is active but has a future cancel date
Orange- means that it is active with a future hold date
Next, you will notice the ability to click on Show Details. This is the area where you can see a history of all membership charges for this patient. You can also cancel the membership, place it on hold or resume it if you need.
Inside of your patients/clients list if you see a red icon next to a patient's name, you can hover over the icon and it will indicate that there is a past due membership invoice. This gives you the opportunity to reach out to the patient for update payment details. Keep in mind, your patient can also add a new credit card via the patient portal!
You can now see expired or cancelled membership plans. Check the expired memberships box to see the history. 
Putting a membership on hold
Click into the program via the patient's profile, choose HOLD membership. Then, select how many months you want the membership to be on hold for. 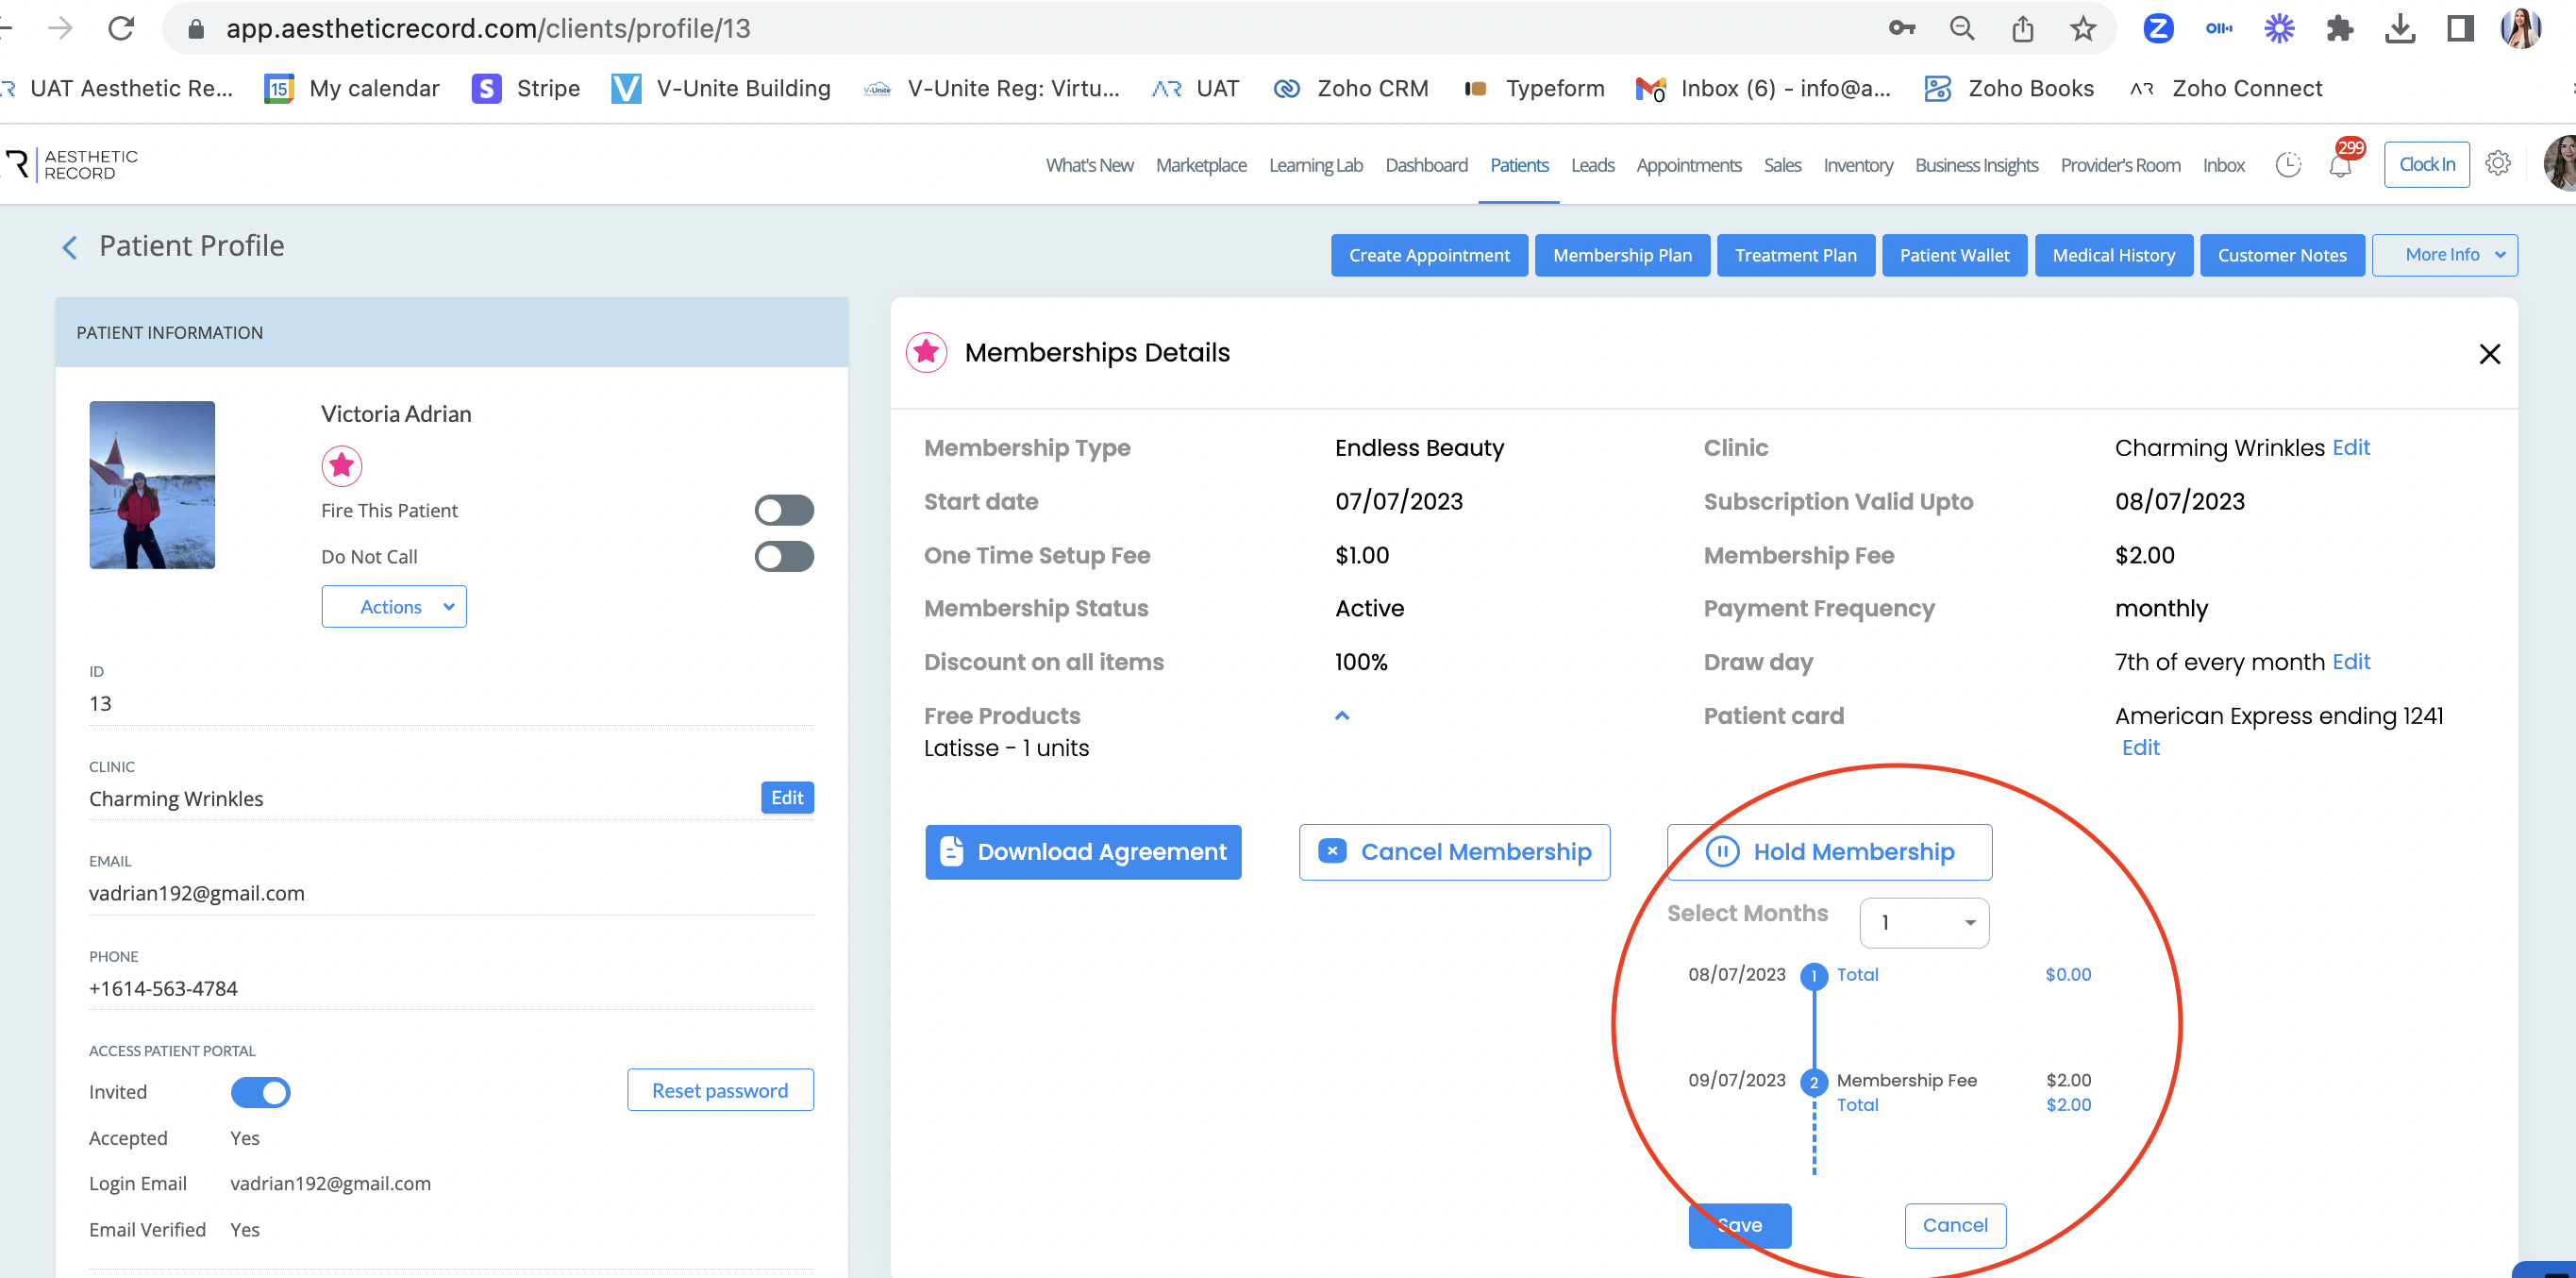
Cancelling a membership
Click the cancel membership button if you wish to cancel. Note- that when you cancel, the patient is valid through their next pay period. This means they will not be charged for their next membership, but since they have paid for the upcoming period they have access through that period.
Cancel Immediately- This will be done from the Control Center (Web Browser). The Membership is canceled at this moment.
Cancel Immediately- This will be done from the Control Center (Web Browser). The Membership is canceled at this moment.